本文是《免费(共164篇)》专题的第 128 篇。阅读本文前,您可以先阅读前面的一些文章:
前言:
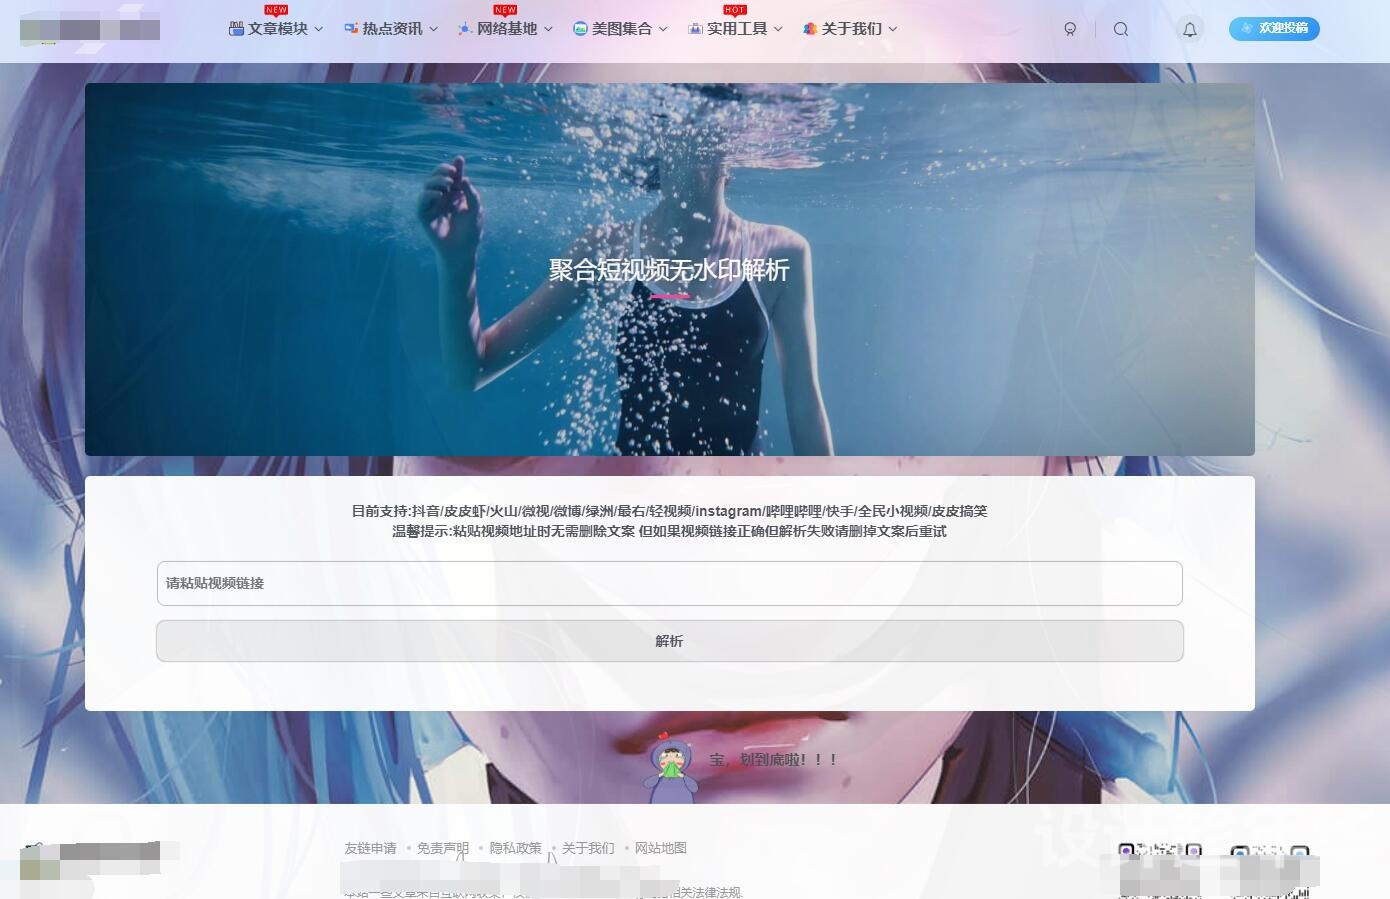
短视频聚合无水印解析页面是我很久之前就弄了,但弄好之后就不怎么管了,采用了非常简洁的样式,非常的简单。说是聚合无水印解析,其实我也没怎么测试过(只测试了抖音、快手、最右这几个短视频软件),解析的API采用大佬的接口。好啦!废话少说,下面安排教程!
美化图:

(其他的WP主题要注意看哦!)页面的头尾代码我只采用符合本站主题(子比主题)的头部和尾部代码,WP其他主题使用可能会出现样式错乱。若其他WP主题使用请自行添加和复制自己主题目录下的默认页面模板(一般都是默认模板的文件都是page.php文件),然后在合适的位置添加下方教程的核心代码即可啦!需要有点基础哦!
第一步:
使用子比的朋友,直接在子比主题目录/zibll/pages/下创建一个PHP文件,然后复制下面的代码添加进去即可完成第一步!
<?php

/**
 * Template name: 聚合解析页面
 * Description:   aggregation_analysis
 */// 获取链接列表
get_header();
$header_style = zib_get_page_header_style();
?>
<main class="container">
    <div class="content-wrap">
        <div class="content-layout">
            <?php while (have_posts()) : the_post(); ?>
                <?php if ($header_style != 1) {
                    echo zib_get_page_header();
                } ?>
                <div class="box-body theme-box radius8 main-bg main-shadow">
                    <?php if ($header_style == 1) {
                        echo zib_get_page_header();
                    } ?>
                    <!---->
                    <html>
                        <head>
                        <meta charset="utf-8">
                        <meta name="viewport" content="width=device-width, initial-scale=1">
                        <style>
                        .inputUrl{width: 100%; display: flex; justify-content: flex-end; align-items: center; flex-direction: column;} .textUrl{width: 90%; height: 45px; outline: none; padding: 4px 8px; border-radius: 8px; border: 1.5px solid #c0c0c0; outline: none; background: #00000000; font-weight: 700; box-shadow: 0px 0px 2px #eeeeee;} .sendBtn{width: 90%; height: 40px; margin: 15px; border-radius: 8px; box-shadow: 0px 0px 2px #555; font-weight: 700;} .sendBtn:hover{background-color: #FFF;} .down{text-align: center;} .down a{display: inline-block; padding: 0 1em; margin: 0.5em; height: 2.75em; border: solid 1px #c8cccf; border-radius: 4px; background-color: transparent; color: #414f57!important; text-align: center; text-decoration: none; white-space: nowrap; line-height: 2.75em; font-weight: 700;} #myDiv{color: #0089fff0; overflow-y: hidden; background-color: #f0f1f1fa; margin: 10px; border-radius: 8px; word-wrap: break-word;} #myDiv1{text-align: center;font-weight: 700;padding: 10px;}
                        </style>
                        </head>
                        <!--<div id="wrapper">-->
                            <!--<form method="post">-->
                              <div id="myDiv1">
                                <p>
                                  目前支持:抖音/皮皮虾/火山/微视/微博/绿洲/最右/轻视频/instagram/哔哩哔哩/快手/全民小视频/皮皮搞笑
                                  <br>
                                  温馨提示:粘贴视频地址时无需删除文案 但如果视频链接正确但解析失败请删掉文案后重试
                                </p>
                              </div>
                              <div class="inputUrl">
                              <input class="textUrl" type="text" placeholder="请粘贴视频链接" id="input1" class="longurl">
                              <input class="btn sendBtn" type="button" onclick="setValue()" value="解析">
                              </div>
                            </form>
                            <div class="down"></div>
                              <div id="myDiv"></div>
                        </div>
                        <script>
                        function  setValue(){
                        var v =  document.getElementById("input1").value;
                            var xmlhttp;
                            if(window.XMLHttpRequest){
                              xmlhttp=new XMLHttpRequest();
                              }
                            else{
                            xmlhttp=new ActiveXObject("Microsoft.XMLHTTP");}
                            xmlhttp.open("GET","https://tenapi.cn/video?url="+v,false);
                            xmlhttp.send();
                            document.getElementById("myDiv").innerHTML=xmlhttp.responseText;
                           var jsonObj = JSON.parse(xmlhttp.responseText);
                            $(".down").html('<h4 id="form-title" style="font-weight: 700;">'+jsonObj.title+'</h4><a id="form-cover" href="'+jsonObj.cover+'" target="_blank" download="video">下载封面</a><a id="form-video" href="'+jsonObj.url+'" target="_blank" download="video">下载视频</a><a id="form-music" href="'+jsonObj.music+'" target="_blank" download="video">下载音乐</a>');
                        }
                        </script>
                    </html>
                <!---->
                <?php endwhile;  ?>
                </div>
                <?php comments_template('/template/comments.php', true); ?>
        </div>
    </div>
    <?php get_sidebar(); ?>
</main>
<?php
get_footer();
说明:代码中相关的文字,可以自行修改。
第二步:
新建页面,在WP网站后台—》页面—》新建页面—-》页面属性—》模板—》选择“WIIUII-聚合解析页面”,填写标题、固定连接(非必须),最后发布即可。
您已阅读完《免费(共164篇)》专题的第 128 篇。您可以继续阅读该专题下面的其它文章:


